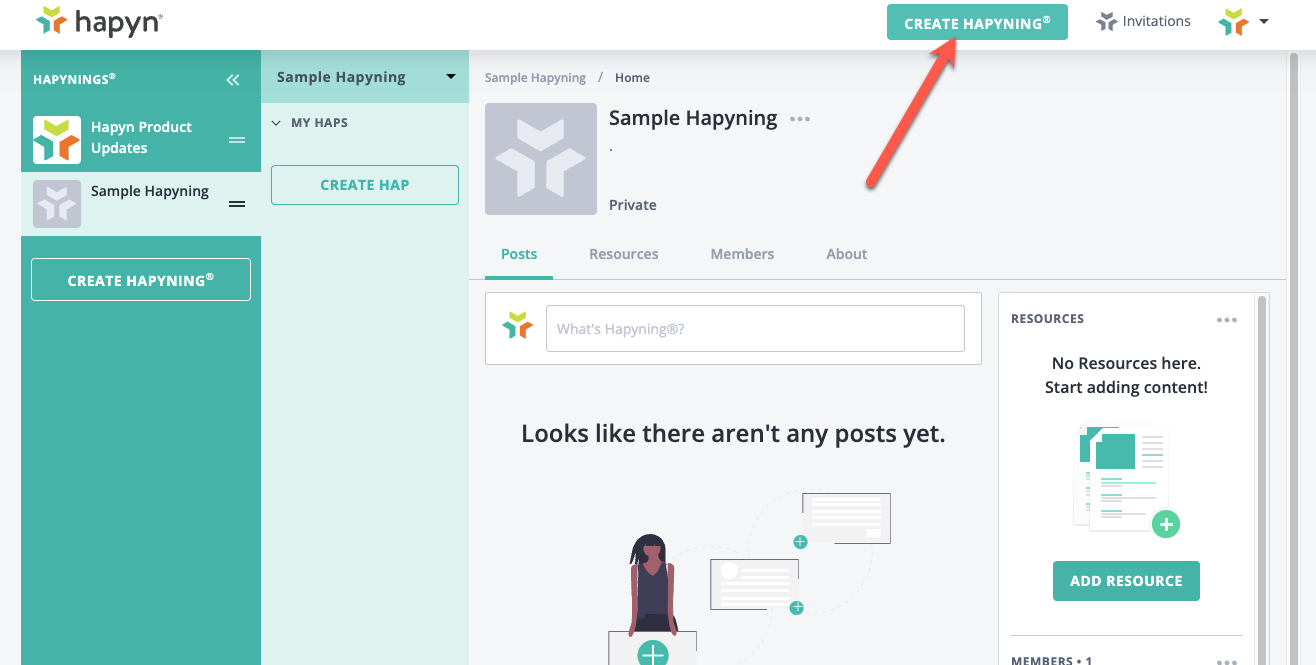
Here is how to create your own hapyning(s).
Click on Create Hapyning at the top of the page.
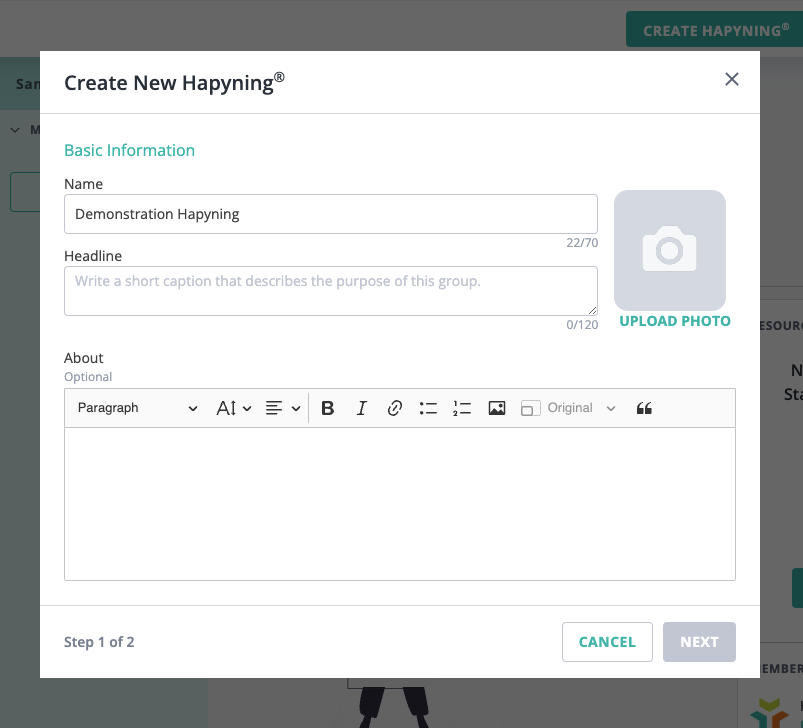
Add the Basic Information
Choose a name, create a headline (short caption). You can also add a longer description under “About” and add a picture/logo if you choose.
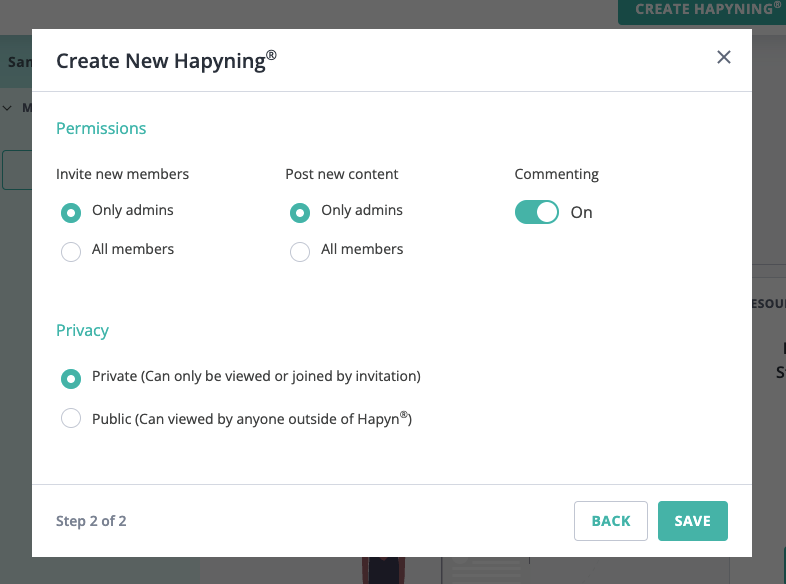
Set the rules for your hapyning.
Who can invite members or reate new posts?
Do you want to allow comments on posts?
Do you want it to be private to members only, or available to public non-members?
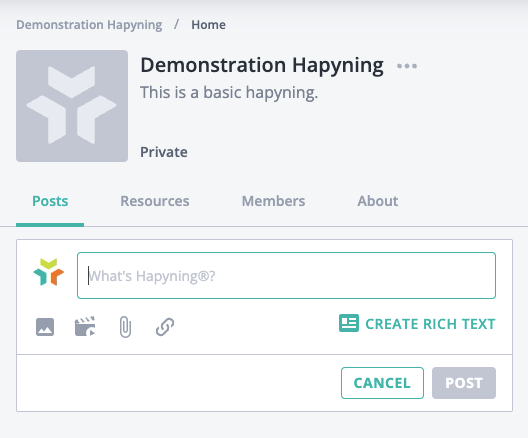
Start creating content
After you click Save, your hapyning is ready to go.
Create a Post:
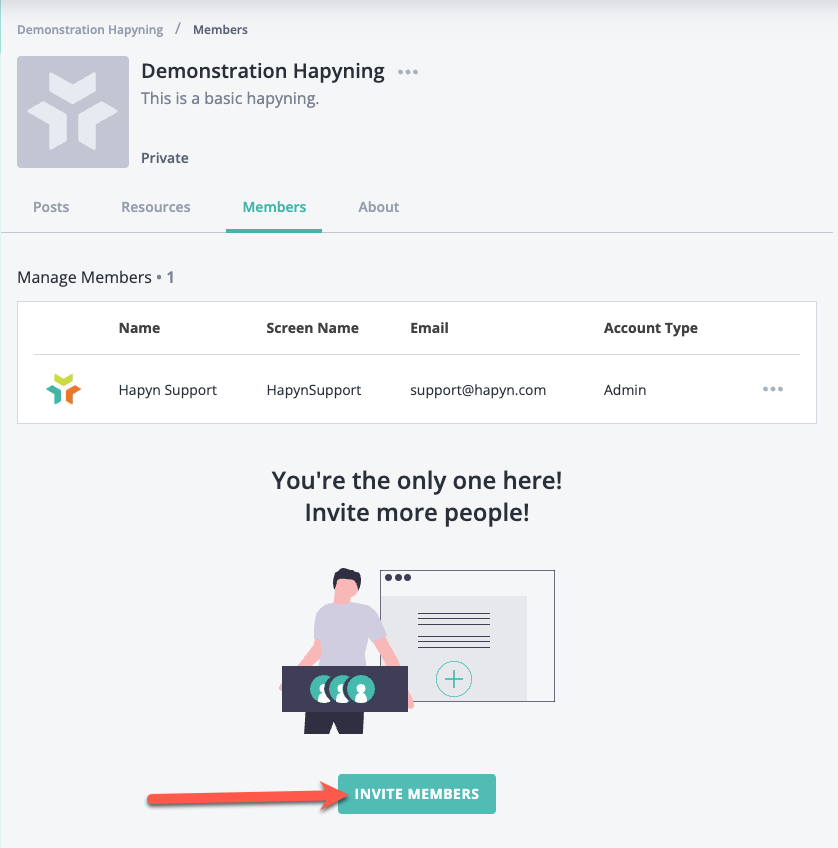
Invite people to join your hapyning
Go to the Members tab and click “Invite Members”.
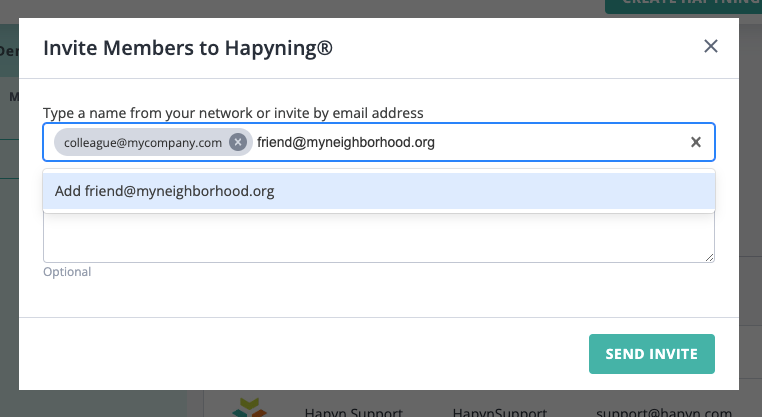
You can invite members by entering their email addresses. You can invite more than one at a time.
Optional Invitation Link
Or you can can also enable an invitation link, which you can copy and paste into your own email client or messaging service.
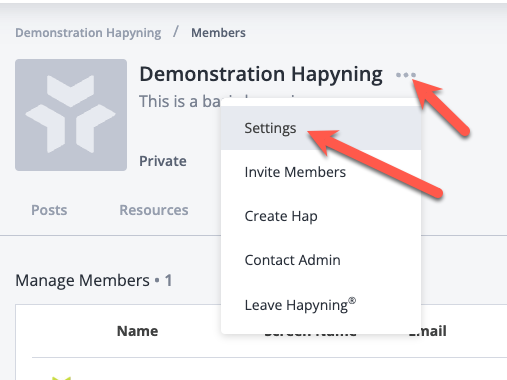
To do this choose the “Settings” option from the menu next to the hapyning name.
Then toggle the "Invitation Link" to Enabled and click “Save Changes”.
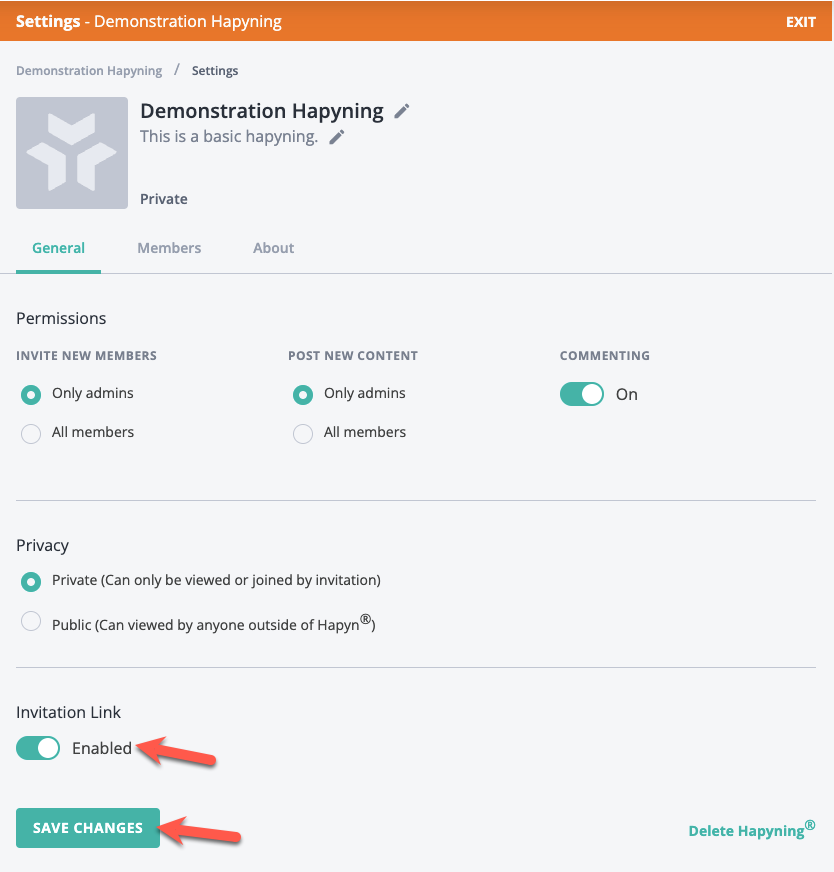
Once you save the Invitation Link setting, you can then copy the link and use it wherever you like.
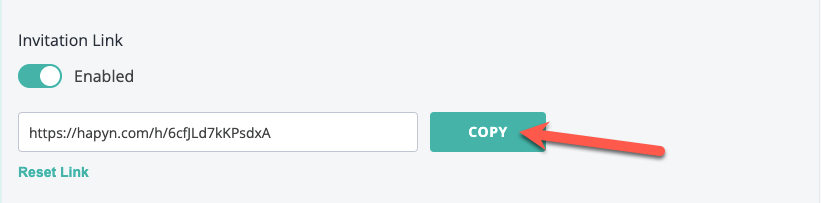
You can deactivate a sharing link at any time by clicking the “Reset Link” option beneath the link, or by toggling the setting back to Disabled.
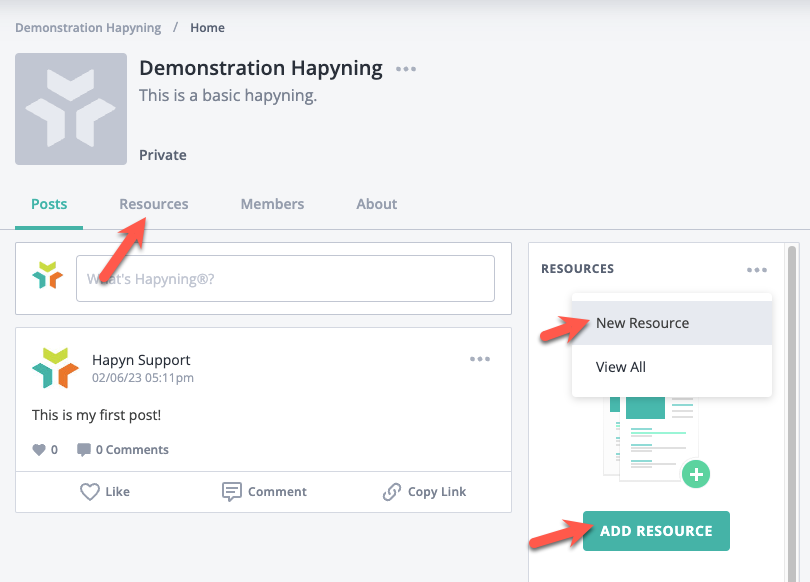
Add Resources
If you would like to create content to be used as resources for your members to find easily at any time, you can create a new Resource from the Resources tab or from the main posts page as well.
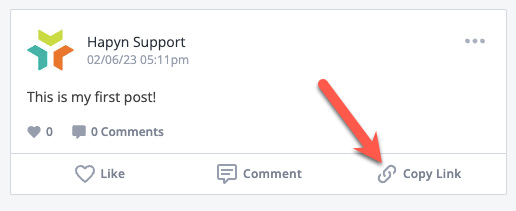
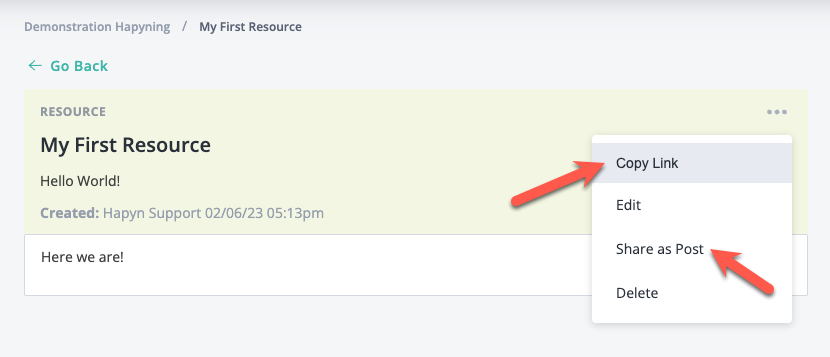
Share Posts and Resources
Posts can be shared by copying the link to the post and pasting it wherever you'd like.
Resources can also be shared. Either by copying the link (to share wherever) or by creating a post within your hapyning.
Note that the post or resource may only be visible to members of your hapyning, unless you've set the Privacy to Public in the hapyning settings.
Please let us know if you have any questions!